Occupational Therapy Dressing Techniques for Daily Independence

Last Updated: November 10, 2026
Quick Summary
Occupational therapy dressing techniques follow a consistent morning routine: sit on a firm chair with feet flat, gather clothes first, and dress the weaker side first. Key methods include the figure-four technique for pants and laying shirts face down to thread sleeves one-handed.
Dress at the same time each day when rested, sitting with feet flat on the floor.
Lay out clothes the night before, with underwear on top, then pants, then shirt.
In the figure-four technique, cross the ankle over the opposite knee to reach your foot.
After a stroke, dress the affected side first and undress it last.
Start caregiver support at the lowest level that works and fade hands-on help over weeks.
Tired of the morning dressing struggle?
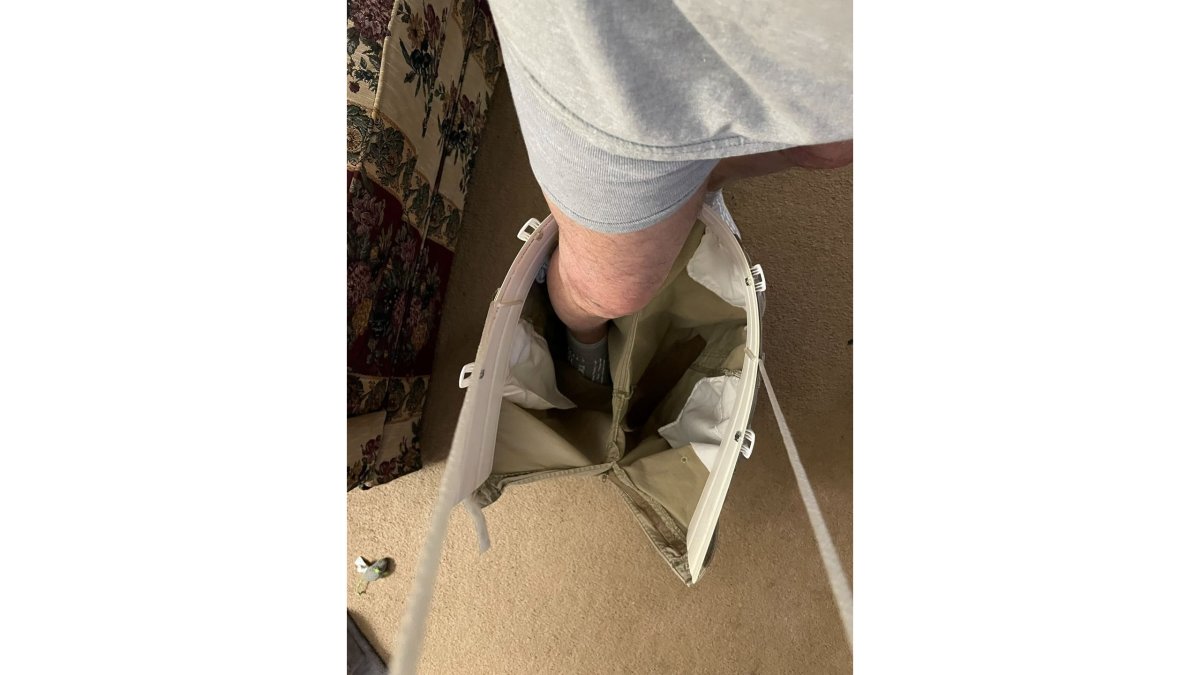
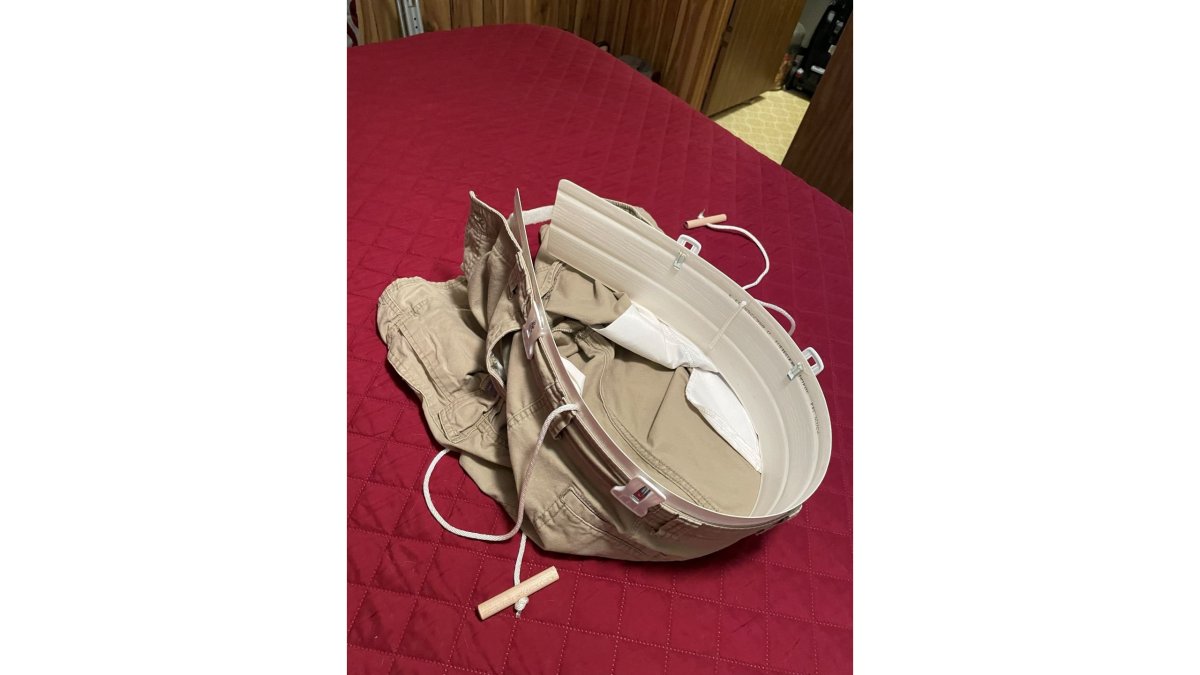
Pants Aid helps you step into pants and underwear without bending or strain.
Table of Contents
Building a Consistent Dressing Routine That Works for You
Occupational therapy dressing techniques work best when they follow the same order every morning. That single habit, a consistent routine, does more for independence than any single gadget. People often struggle with dressing not because the task itself is hard, but because every morning can feel like a fresh puzzle.
A consistent dressing sequence removes the guesswork. You sit in the same spot. You reach for clothes in the same order. Your hands learn the pattern, and the whole task gets faster.
Start with these habits:
Dress at the same time each day, when you are rested
Sit on a firm chair or the edge of the bed with feet flat
Gather everything you need before you begin
Work from the affected side first when one side is weaker
Keep a mirror nearby for visual cues and checking fasteners
The routine is the foundation. Everything below builds on it.
Preparing and Laying Out Clothing Before You Start
Clothing setup is the step most people skip, and it costs them time. Lay out clothes the night before, or before you sit down. Put underwear on top, then pants, then shirt. Set shoes and socks beside your feet.
A few setup habits pay off:
Open buttons and unzip zippers before you sit
Loosen sleeves and pant legs so limbs slide in
Place the affected arm's sleeve toward that side
Keep a reacher or dressing stick within arm's reach
This is a pre-dressing skill occupational therapists teach early. It sounds minor. It removes half the frustration.
Choosing Loose Clothing and Easy Fasteners
Loose clothing is not a compromise. It is a strategy. Fabrics with some stretch, elastic waistbands, and roomy armholes make every dressing technique easier.
Fasteners deserve real thought. Buttons and zippers demand fine motor skills that arthritis or one-sided weakness can take away. Options that work well:
Elastic-waist pants and pull-on styles
Front-closing bras or bras that fasten in front
Shirts with snap closures or magnetic fasteners
Slip-on shoes with a wide opening
Adaptive clothing brands now make these styles look like ordinary clothes. That matters for dignity as much as function.
Occupational Therapy Lower Body Dressing Techniques
Lower body dressing is where most people need help first. The standard method is to sit, bring the weaker leg up, and thread the pant leg over the foot and up the calf. Then the stronger leg goes in.
The order matters. Weaker leg first, stronger leg second. That way the stronger side can do the lifting and adjusting.
For underwear, the same sequence applies. If you want a deeper walkthrough, our guide on how to put on underwear with limited mobility breaks it down step by step.
Watch out: pulling pants up while standing on one leg can increase the risk of a fall during dressing. Sit to thread, and use a stable surface to rise.
The Figure-Four Dressing Technique for Pants and Underwear
The figure-four dressing technique is the safest way to reach your feet without bending forward. Sit on the edge of the bed. Cross the ankle of the leg you are dressing over the opposite knee, so your legs form the number four. This position brings your foot up to your hands instead of sending your hands down to your foot.
From there:
Hook the pant leg opening over your toes
Pull the fabric up over your heel and ankle
Work it up the calf as far as comfortable
Uncross the leg and repeat on the other side
Stand and pull the waistband into place
The figure-four position keeps your trunk upright and gives you a clear view of what your hands are doing. It also gives you a clear view of what your hands are doing.
If you want to see the seated method in action, watch our video demo of getting dressed while seated. Seeing the movement is often easier than reading it.

Hemi Dressing Techniques Occupational Therapy After Stroke
Hemi dressing techniques are the methods occupational therapists teach after a stroke, when one side of the body is weaker. The rule is simple: dress the affected side first, undress it last. That gives the stronger arm and leg the job of moving fabric over the weaker limb.
For hemiplegia, a few adjustments help:
Sit for everything, including shirts
Lay the shirt on your lap, affected sleeve first
Use the stronger hand to guide the fabric over the weaker arm
Choose shirts that open fully at the front
Task repetition builds the pattern. Practice the same sequence daily, even on slow mornings. The goal is not speed. It is a routine your body trusts.
One-Handed Dressing Techniques for Shirts and Fasteners
One-handed dressing techniques rely on gravity, friction, and a few smart shortcuts. The classic method: lay the shirt face down on the bed with the collar toward you. Slide your weaker arm into the sleeve, then pull the shirt over your head by the collar. Thread the stronger arm last.
For fasteners, fine motor skills are the bottleneck. Buttons are the hardest. Options that work:
Replace buttons with snap or magnetic closures
Use a button hook for the buttons you keep
Choose pullover styles with stretch collars
Loop a zipper pull through a ring for a bigger grip
A common mistake is fighting a fastener for ten minutes out of habit. Swap it. Nobody is grading your buttons.
Adaptive Equipment and Dressing Aids That Make a Difference
Dressing aids exist to reduce the bending, reaching, and grip strength that make dressing hard.
Selection starts with one question: what specifically stops the movement? If the barrier is bending to the floor, a reacher or long-handled shoehorn solves it.
A practical selection guide:
Aid | What It Helps With | Best For | Trade-offs to Check |
Pants Aid | Threading pants and underwear without bending | Limited hip movement, post-surgery, arthritis | Must match waist size; check the opening clears the foot |
Dressing stick | Reaching sleeves and pulling up pants | Shoulder or back limits, short reach | Too long a stick is hard to control in tight spaces |
Button hook | Fastening small buttons | Arthritis, weak grip, one-handed dressing | Works best on standard buttons; test on thick or shank buttons |
Sock aid | Pulling socks over the heel | Cannot reach feet, hip precautions | Sock must slide on the aid without bunching |
Long-handled shoehorn | Sliding shoes on | Cannot bend to the floor | Flexible shoehorns help with angle but can flex too much under pressure |
Reacher | Picking up clothes, shoes, and dropped items | Limited bend, wheelchair use | Jaw grip strength varies; test pickup of a sock, not just a can |
Our Pants Aid is a lower garment dressing aid that helps you step into pants without strain. You can see the Pants Aid dressing device and its sizes on our product page.
A few selection habits save money and frustration:
Test the aid with the exact clothing the person wears daily, not with a demo garment
Check the grip surface; a slick handle is a fall risk when pulling pants up
Confirm the aid fits the seating height the person uses most
Keep the aid within reach before dressing starts, not in a closet
Reassess every few months; needs change after surgery or with fatigue
Watch out: an aid that slips or bends under load can be unsafe. Check the grip and the build before you rely on it daily, and replace any aid that flexes visibly during use.
Fall Prevention and Safe Dressing Positions
Fall prevention starts with position. Most dressing falls happen when someone stands to pull up pants or bends over to reach a shoe. Both moves shift your center of gravity past your base of support.
Safe positions to use:
Sit for all lower body dressing
Keep both feet flat on the floor
Use a firm chair with armrests, not a soft sofa
Rise slowly, holding a stable surface
Keep a walker or cane within reach
Posture matters too. Leaning forward past your toes while seated is a balance risk. The figure-four position keeps your trunk upright. If bending is your main worry, our guide on how to put on pants without bending safely covers the positioning in detail.
How Caregivers Can Offer Cueing and Fading Support
Caregiver assistance works best when it fades. The goal is not to dress someone.
Think of support in three levels, from least to most hands-on:
Verbal cue: a short phrase that prompts the next step, such as "weaker leg first" or "now the other sleeve."
Visual cue: pointing to the next item, gesturing toward the affected side, or setting items in sequence on the bed.
Hands-on assist: steadying a shoulder, guiding a hand, or completing one step the person cannot do safely.
Start at the lowest level that works. If a verbal cue gets the person moving, do not add a visual cue.
A simple fading plan over several weeks:
Week one: hands-on assist for the hardest step, verbal cues for the rest
Week two: hands hovering nearby for safety, verbal cues only
Week three: verbal cues only, standing by without stepping in
Week four: check in at the start and end, let the person work through the sequence
Cueing language matters. Keep cues short, consistent, and tied to the routine. "Weaker leg first" works better than a paragraph of explanation.
Watch out: stepping in to finish a task because it is faster teaches the person to wait for help.
For more on protecting privacy and comfort while helping, read our guide on caregiver aids for dressing with more dignity.
Dressing should not feel like a daily battle. If bending, reaching, or balance is slowing you down, the right tool changes the whole morning.
Frequently Asked Questions
What dressing techniques do occupational therapists recommend?
Occupational therapists typically recommend a consistent dressing sequence, laying out clothing within reach, and using adaptive techniques matched to your mobility. For lower body, common approaches include the figure-four position, dressing the affected side first, and using a dressing aid to guide pants over the feet. Therapists also suggest loose clothing with simple fasteners and practicing the routine regularly to build muscle memory and confidence.
How do you dress one-handed after a stroke?
One-handed dressing techniques focus on doing the work with your unaffected arm while letting gravity and friction help. For pants, sit on the bed edge, cross the affected leg over the unaffected one, and guide the pant leg up with your strong hand. For shirts, lay the garment on your lap, thread your affected arm in first, then pull it over your head with your strong arm. Practicing the same order each day makes the routine faster.
What is the figure-four dressing technique?
The figure-four technique involves sitting and crossing the leg you need to dress over the other, forming a figure-four shape. This position brings your foot closer to your hands and reduces the need to bend forward, which helps if you have limited hip mobility or balance concerns. You then guide the pant leg over your foot and up your calf before switching sides. It is a core lower-body dressing technique taught in occupational therapy.
What dressing aids can make getting dressed easier?
Common dressing aids include a lower-garment aid that helps you step into pants without bending, a long-handled shoe horn, sock aids, and button hooks. A lower-body dressing aid like Pants Aid is designed for people with limited reach or balance, available in small, medium, and large sizes with custom sizing on request. Choose aids that match your specific mobility limits and practice with them during therapy sessions before relying on them alone.
Comments