How to Dress With Arthritis: A Step-by-Step Guide

Table of Contents
Last Updated: October 14, 2026
How to Dress With Arthritis: Start With the Right Setup
Learning how to dress with arthritis starts with one shift in thinking: the goal is not to push through stiffness, but to set up your morning so your joints never have to fight.

Arthritis causes pain, swelling, and stiffness, often in the hands, wrists, hips, and knees, the joints you use to bend, grip, and pull. Rushing tightens your grip, twists your spine, and raises your fall risk. Two habits fix most of that before you open a drawer:
Lay out your clothes the night before
Gather your dressing aids before you begin
Lay Out Clothes the Night Before
Nighttime planning removes every morning decision. Pick one full outfit, check the weather, and set it out in the order you will put it on: underwear, pants, top. Morning stiffness is worst right after you wake, so you want zero closet hunting with cold, tight hands. A few habits help:
Choose loose-fitting clothing over anything snug
Skip back buttons and tiny hooks when you plan the outfit
Set shoes and socks beside your chair, not across the room
Keep a light robe within arm's reach for the walk to the bathroom
If a caregiver helps you, lay everything out together so you both know the plan.
Gather Dressing Aids Before You Begin
Dressing aids let you put on clothes without bending, gripping hard, or reaching. Keep them in one basket next to where you dress, so you never stop mid-task to search.
Common tools include a long-handled shoehorn, a buttonhook, a zipper pull, and a sock aid. If lower garments are the hard part, a dressing aid for pants lets you step in without bending to your feet.
Pro Tip Warm your hands before you dress. Run them under warm water or roll a soft ball between your palms for a minute. Warm joints open more easily, and you will grip fasteners with far less force.
Adaptive Clothing for Arthritis: What to Look For
Adaptive clothing for arthritis uses closures, fabrics, and cuts that are easier on stiff joints, and the best pieces hide the help in plain sight. The right choice depends on which joints trouble you most: a shirt that works for stiff hands may fail a frozen shoulder, and pants easy on hips can still be hard on knees.
Match the Clothing to Your Most Painful Joints
Hands and wrists: Look for magnetic closures, snap buttons, or large zipper pulls. Avoid tiny hooks, back buttons, and tight cuffs that require pinching.
Shoulders: Front-closure garments are essential, since reaching behind your back or overhead is hardest for a stiff shoulder.
Hips and knees: Elastic waistbands and side-zip pants reduce bending and twisting.
Feet and ankles: Look for wide openings and adjustable closures. Velcro straps or slip-on shoes eliminate bending and tying, and socks with loose cuffs pull on easily.
Choose by Feature, Not by Brand
When you shop, ignore the label and check these features:
Closures: Magnetic > snap > large button > small button > hook-and-eye. Velcro fastens easily but can catch on fabric and lose grip; magnetic closures suit weak hands but may not hold up in the wash.
Fabric: Look for two-way stretch, soft knits, and smooth linings. Avoid stiff denim, heavy wool, and clingy fabrics. Cotton blends with a little spandex slide on easily and breathe well.
Openings: Wider necklines, sleeve openings, and leg holes make a big difference. Aim for roomy through the joints but neat at the edges.
Seams: Flat seams and tagless labels reduce irritation, which matters with sensitive skin or swelling.
Lower-Cost Modifications You Can Do at Home
You do not need to replace your whole wardrobe. Small changes make existing clothes easier:
Replace buttons with Velcro dots or magnetic strips (available at craft stores)
Add ring pulls to zippers with a key ring or ribbon loop
Sew elastic loops inside waistbands to help pull pants up
Cut the backs of shirts or add a snap closure to make them step-in
Use a seam ripper to remove tight cuffs or collars
Start with the pieces you wear most: pants, a daily top, and a warm layer. If you use a caregiver, involve them in choosing features that work for both of you, so helping is easier and you keep as much independence as possible.
Easy Clothing Fasteners for Arthritis: Buttons, Zippers, and More
Easy clothing fasteners for arthritis replace small, fiddly closures with ones needing less pinch and twist. Buttons, zippers, and hooks are the biggest troublemakers, and each has a workaround.
Fastener | The Problem | Easier Option | Aid That Helps |
Buttons | Needs fine pinch grip | Magnetic or snap closures | Buttonhook |
Zippers | Small tab, hard to hold | Ring or loop zipper pull | Zipper pull |
Hooks and eyes | Tiny, needs two hands | Larger hook or Velcro | Dressing stick |
Laces | Bending and tying | Slip-on or Velcro shoes | Long-handled shoehorn |
Bras | Back clasp, twisting | Front closure or pullover | Front-closure bra |
Velcro is the workhorse: it needs only a press, not a pinch, and holds firm all day. For buttons you want to keep, a buttonhook slides through the hole and pulls the button through in one motion, saving your hands every morning.
How to Put On Pants With Limited Mobility
Knowing how to put on pants with limited mobility comes down to two rules: sit down, and let a tool do the bending. Standing on one leg to thread a pant leg is the most common cause of a morning fall.
Sitting Technique for Balance and Safety
Sit on a firm chair with armrests, not a soft sofa, so you can push up safely. Then follow this order:
Sit and lean back slightly against the chair
Cross one ankle over the opposite knee, or bring the foot up with your hands
Feed the pant leg over your foot and up to the knee
Repeat with the other leg
Stand with one hand on a steady surface, then pull the waistband up
Keep your feet flat when you stand. Never hop.
Using a Dressing Aid for Lower Garments
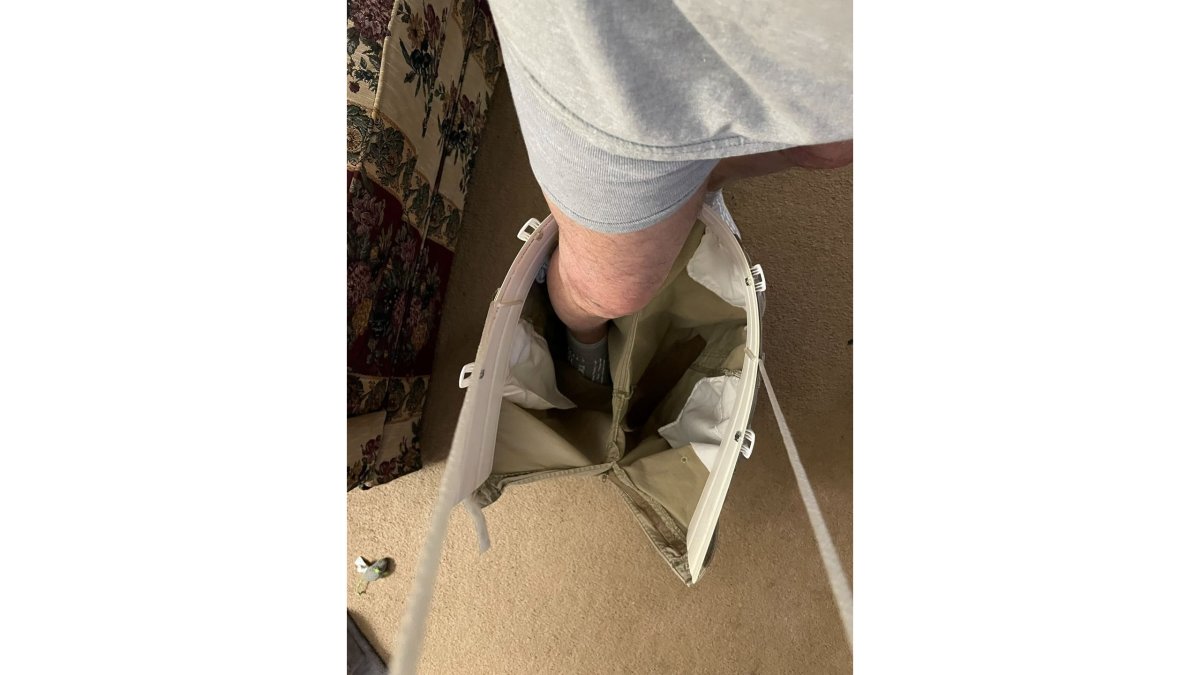
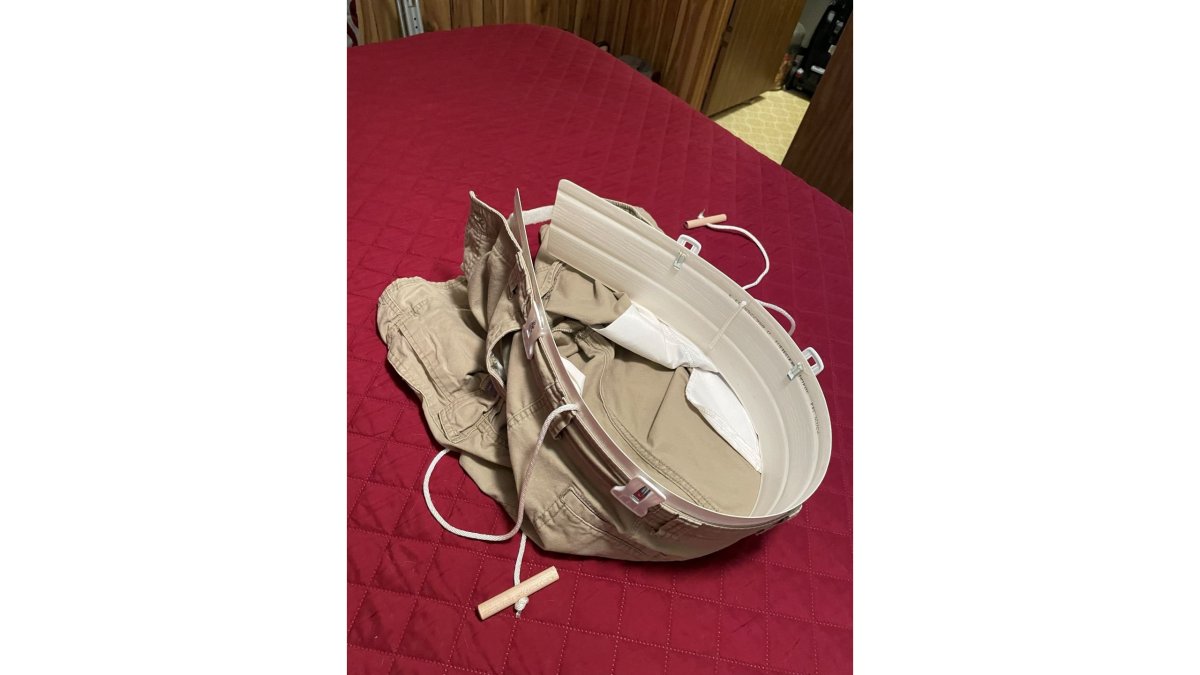
A lower-garment dressing aid lets you step into pants, shorts, or a skirt without bending to your ankles. You load the waistband onto the tool, lower it to the floor, and step in, then pull the aid up and the pants come with it.
This is where Pants Aid fits in. Our tool is built for exactly this step, so you can step into clothes without strain instead of folding at the waist.
Best For Anyone whose hips, knees, or back make bending to the floor the hardest part of the morning. It suits both people dressing alone and caregivers helping someone else.
Dressing Aids for Arthritis: Tools That Reduce Strain
Dressing aids for arthritis replace bending, pinching, and twisting with a longer reach or a bigger handle. Four or five cover most of the routine, but how you use them matters as much as the tools.

Step-by-Step Techniques for Common Aids
Sock aid: Sit on a firm chair.
Long-handled shoehorn: Sit and place the shoe between your feet.
Buttonhook: Hold the wire loop through the buttonhole, hook the button, and pull it through in one smooth motion.
Zipper pull: Attach a ring or ribbon loop to the zipper tab, hook your finger through it, and pull.
Dressing stick: Use the hook end to pull clothes toward you or push sleeves through.
Lower-garment aid: Load the waistband onto the tool, lower it to the floor, and step in.
Condition-Specific Tips
Rheumatoid arthritis (RA): Morning stiffness is common, so warm your hands first. Use aids with thick, soft handles.
Osteoarthritis (OA): Pain is often worse with activity, so pace yourself. Sit for as much as possible. If your knees are affected, use a lower-garment aid and avoid standing on one leg.
Post-surgery (hip or knee replacement): Follow your surgeon's precautions. You may need a reacher or dressing stick to avoid bending past 90 degrees.
Shoulder pain or frozen shoulder: Avoid overhead reaching.
Safety and Fall Prevention
Most falls happen when you stand on one leg or bend to reach your feet. Sit for every step that involves your legs or feet. Keep one hand on a steady surface when you stand. Use a non-slip mat on hard floors.
A note for caregivers: let the person do the parts they can. Handing over the whole task is faster, but it costs independence, and that matters more than speed.
Watch Out Never stand on one leg to pull up pants or socks. A single wobble on a hard bathroom floor can mean a broken hip, and that sets recovery back by months.
A Head-to-Toe Dressing Routine for Arthritis
A set order saves energy and keeps you steady. Dress the lower body first, seated, then the upper body:
Underwear and socks while seated, using a sock aid
Pants or skirt with a lower-garment aid, still seated
Shoes with a long-handled shoehorn, seated, before standing
Top standing or seated, front-closure first
Warm layer last, so you are not overheated mid-task
Coat and bag by the door, ready before you leave
Dress your weaker side first. It is easier to pull fabric over a stiff arm before the other sleeve is on.
Safety and Fall Prevention While Getting Dressed
Fall prevention while getting dressed is mostly about your setup, not your willpower. Most falls happen during standing transfers, when one hand is busy with clothing and the other is not holding on.
Make the room work for you:
Sit for every step that involves feet or legs
Keep one hand on a fixed surface when you stand
Use a non-slip mat on hard floors
Clear the path between bed, chair, and closet
Keep a phone or alert button within reach
Turn on the light before you start, every time
If you use a walker, park it right beside your chair so it is the first thing you touch when you stand.
Cold weather adds a layer of risk, because stiff hands grip less well. Warm clothing that protects your extremities helps you keep your grip on rails and handles.
Conclusion: Building a Dressing Routine That Works for You
The hardest part of dressing with arthritis is not any single fastener. It is the feeling that your morning has become a chore you have to fight through. It does not have to be.
Build the routine once, in the right order, with the right tools beside you. Then repeat it. Independence comes back in small steps, and it starts with the first one.
At Pants Aid, we make a lower-garment dressing aid that helps you step into clothes without strain.
Frequently Asked Questions
What clothes are easiest to put on with arthritis?
Loose-fitting clothing with elastic waistbands, magnetic closures, or hook-and-loop fasteners (Velcro) is easiest to manage. Front-closure tops and pull-on pants reduce the need for fine motor skills and grip strength. Fabrics with some stretch, such as cotton blends or jersey knits, move with you rather than against you. Avoiding tight cuffs, small buttons, and back zippers makes a noticeable difference in how quickly and comfortably you can dress each morning.
How can I put on pants with limited mobility?
Sit on a stable chair or the edge of your bed. Gather one pant leg and guide your foot through while keeping your knee bent. Use a dressing aid to reach the waistband without bending forward. Pull the pants up to your knees, then stand (with support if needed) to bring them to your waist. If balance is a concern, stay seated and use a tool designed for lower garments to complete the process without straining.
What fasteners are easiest to use with arthritis?
Magnetic closures and hook-and-loop fasteners (Velcro) require the least hand strength and dexterity. Large zipper pulls with a loop or ring are easier to grip than standard tabs. Buttonhooks can help if you prefer traditional buttons. Elastic waistbands eliminate fasteners on pants entirely. When shopping for easy clothing fasteners for arthritis, look for pieces that close with one hand or a simple pull motion rather than pinch-and-twist movements.
Can a caregiver help someone with arthritis get dressed while preserving their independence?
Yes. The key is to let the person do as much as they can themselves. Set out clothes and aids within reach, then step back. Offer verbal cues or steady a chair rather than taking over. A dressing aid for lower garments lets someone with limited mobility manage pants independently, which protects dignity and reduces caregiver strain. Occupational therapists can suggest specific techniques and tools based on the person's joint involvement and balance.
Comments